
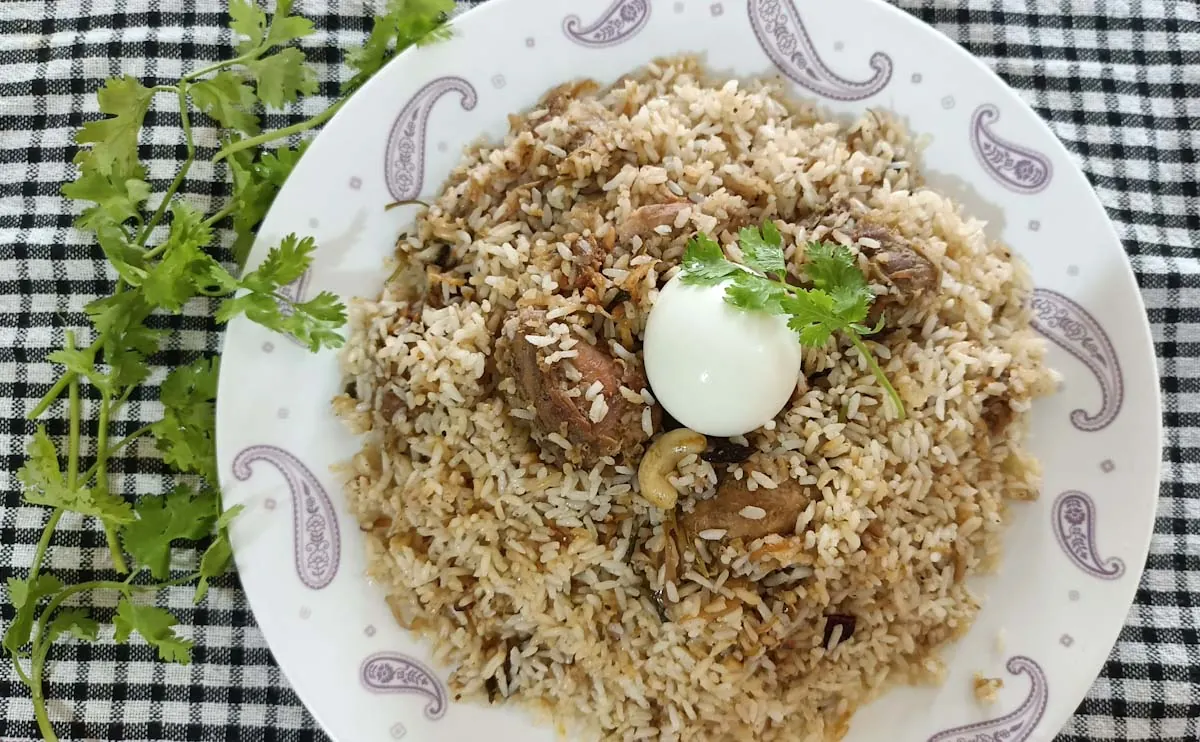
Thalassery Chicken Dum Biriyani
Table of Contents
Just tell me one person who does not like Biriyani! Oh! I am a great fan myself! Memories of Biriyani go back to my childhood. My mother learnt the method to cook Hyderabadi Biriyani from a friend, Sharmila. My mother used to cook the mutton biriyani version quite often. And the best part was to clean the Kadai where the mutton masala was cooked. Oh, it was simply delicious. I will surely post an entry for that recipe soon. For today, I am presenting you the Thalassery Biriyani! It’s a Chicken Dum Biriyani, Kerala Style!
Thalassery Dum Biriyani

Some years back, when we were in Trivandrum, there was this new takeaway biriyani counter called AJWA. They used to sell only Thalassery Dum Biriyani, all varieties, chicken, mutton and vegetable biriyanis. We used to buy from there quite often. The speciality was it was neither too oily nor did our plates have the remnants of Vanaspathi(dalda). We never used to feel heavy too after eating. And it was not too spicy too. The rice and the masala were even. Quite similar to that of AJWA’s Biriyani.
Later, I started researching. I tried different recipes, made many experiments and at last, I got a balanced output. And the recipe is given here. Come, let’s cook a very tasty Chicken Dum Biriyani, Kerala Style together!!
Intricate Details to Note
1. Timing is the key
When we have a recipe card, we tend to add the ingredients in order. But to get a perfect biriyani, timing is very important. Some key moments:
- While making Birista, remove them just as it is golden in colour. Do not leave it for long. Birista, even after it is removed from the oil, still cooks for a while as it is hot. If we wait to attain colour in oil, it will get very dark at the end and intervene with the final biriyani’s colour.
- Adding salt to the chicken masala is also a key. This recipe doesn’t call for a detailed marination procedure. The washed and cleaned chicken is added as it is and mixed well in the masala base. Once the onion for the base turns translucent, we add the crushed ginger, garlic and green chilli. Just as the raw smell vanishes, we add the chicken pieces and sauté well. As the chicken pieces turn whitish, we add salt. The science behind this is that as the protein pores open up, it is easy to soak in the flavours. That is when we add salt. I also prefer to add a pinch or two of the masala powder that we prepare. This helps the flavours to seep into the meat too rather than just on the top layers.
- When layering is done for dum, we need to keep in mind that both the rice and the chicken masala base are hot. So when put for dum, they will impart their flavours to each other. Thus the biriyani smell and taste reach the next level.
2. Quantity enhances flavours
To understand the different aspects of a perfect biriyani, I have a separate blog post, “How to make the perfect Biriyani”. Kindly refer to the same for all tips and tricks.
Step by Step Procedure of my Thalassery Dum Biriyani
Ready to make a tasty biriyani! Let’s get started!
Step 1 – Birista
Take a big Kadai, the biggest you have in your kitchen. Take oil in this and let it get hot. Add in the ghee as specified in the recipe. This may seem like a lot of fat but don’t worry, we will be using this for the whole recipe. Once it is quite hot, slowly add in the onions using a Tawa or a wide spoon. Do not drop it from the top. You should add it slowly or else the oil will splatter and you will get hurt. I have got hurt during this process quite a few times. So be a little careful.
Step 2 – Biriyani Masala Powder
Dry fry the given ingredients lightly over low flame. This is just to enhance the flavour oils in them. Then grind to a powder. If you are using an electrical grinder, make it just warm or else the masala will be over warmed and there might be a chance that we lose the important flavour oils.
Step 3 – Thalassery Biriyani Chicken Masala Base
a) Take 2 tablespoons of the oil we used to fry the birista in a big pan. Take the temperature to almost smoky.
b) First, fry the onion slices to translucent. Be careful not to brown them or else we will not get the desired whitish colour of the masala.
c) Next is the time for fresh spices – ginger, garlic and green chilli. We use crushed fresh spices for better flavours. Once the raw smell has gone, it is time to add the chicken pieces.
d) Sauté the pieces till it turns whitish. Then add 1 tbsp of salt and mix well. Add half a teaspoon of the biriyani masala and mix well. Add in the required amount of curd and mix well. Curd helps to tenderize the meat and helps it cook faster, also maintaining its juiciness. Cook for 2 minutes.
e) Tomato is added next. Though it is optional, adding it gives an earthy flavour and enhances the biriyani masala. If you are adding tomato, then this is the time for that, Give it a good mix.
f) Now for some flavouring, 1 tbsp each of mint leaves and fresh coriander leaves and also curry leaves. By this time the chicken pieces would have absorbed the flavours of the biriyani masala added in the beginning. Slowly the fresh flavours also will seep in, bringing all to a balance.
g) Add in the birista, keeping aside just a handful or two for layering and decoration. Mix very well. By now, the chicken would have started to release water and it will cook in its own water and that from the curd. The birista imparts flavours of itself and also of the ghee that was used to fry them.
h) Sprinkle another half teaspoon of the prepared biriyani masala. If you like a lighter masala, you can reduce the amount by a bit but for full flavours, you need this half teaspoon.
i) Close and cook till the chicken pieces are 75% done. Dry out the excess water content, if any. Also, taste for salt and add if necessary at this stage.
j) Finishing the masala is to be done just before layering for dum.
Step 4 – Preparing the Rice for the Biriyani
a) Measure out the rice using a measuring cup and note down. Sometimes, it slips out of our minds. We need to measure the water required for the rice to cook using the same measuring cup.
b) We need one and a half times the rice quantity. Measure using the same measuring cup. Measure out water in a big pan. And bring to just boil.
c) Prick, clean, wash and drain the rice. Keep aside.
d) In the meantime, take the vessel you need to cook rice. Add in 3/4th of the remaining oil-ghee mixture used to fry Birista. This gives flavours. Add the star anise and sauté for a minute till it gives off the aroma. Add the sliced onion and fry till translucent. Now, add in the cleaned rice. Sauté well so that each grain is coated with the fat. Now add salt and give a nice mix.
e) Pour in the hot water. Be careful and be slow as it will release steam. Mix very well to loosen the rice grains. Try the taste for salt and add in case it is required. The taste of salt should be a little on the upper side as the rice grains will soak in the salt. Be careful not to add too much. This should be a trial and error method. That works better. Add little. Then taste. If required add a little more. Also, add in a tablespoon each of mint and coriander leaves.
f) Let the rice absorb some of the water. Reduce flame and cook covered till almost 80% done. Check-in between so as not to overcook.
Step 5 – Finishing the Chicken Masala Base
a) Add in a lavish handful of coriander and mint leaves, say a ratio of 2/3 coriander and 1/3 mint leaves as mint can overpower all other flavours. Also, add in the juice of one lime.
b) Sprinkle a pinch of prepared biriyani masala. Just for the smell.
Step 5 – Layering
a) Wipe dry the vessel you are using for dum. Pour a tablespoon of the birista oil and anoint the inside of the vessel. Take care not to leave the sides too.
b) The Process of Layering:
i) Take half of the prepared chicken masala and evenly spread it at the base.
ii) Cover up with a layer of one-third rice. Spread evenly.
iii) Sprinkle a pinch of the prepared biriyani masala powder. Top it up with some birista, spreading it over the rice. Sprinkle a tablespoon each of chopped coriander and mint leaves.
iv) Top it up with a thin layer of rice, just to cover up the fresh flavouring.
v) Repeat the process starting with the remaining chicken, then the remaining rice. Top it up with another pinch of Biriyani Masala Powder, Birista and the remaining chopped coriander and mint leaves.
vi) Spread the fried cashew and raisins.
c) Sealing the vessel:
There are two methods by which you can seal the vessel. One of the most common methods is dough made with flour. The dough is elongated and stuck to the rim of the vessel. Press and close the cover of the vessel, sticking it to the dough. This will completely seal the vessel.
Another method is using aluminium foil.
Step 5 – Dum
Traditionally, this process is done on a wood fire. But in modern days, we usually do it over a gas stove in our homes. For this, we would need a thick tawa,
i) First we heat the Tawa and then place the vessel with the biriyani.
ii) The intensity of the flame is to be noted. We begin with high heat. This needs to continue for 3-4 minutes. This is to give a boost to the process. After that, we reduce the flame to medium-low and continue till the end.
iii) By the time we reduce the flame, we need to burn some charcoal. And we place them on the lid of the vessel. Actually, I do not use charcoal. I usually use a coconut shell. I alight them and place them on the lid. That is enough I feel. Recycling!!
iv) Keep on medium-low flame for 10-15 minutes. After that, switch off the gas and let it rest till it is time to serve.
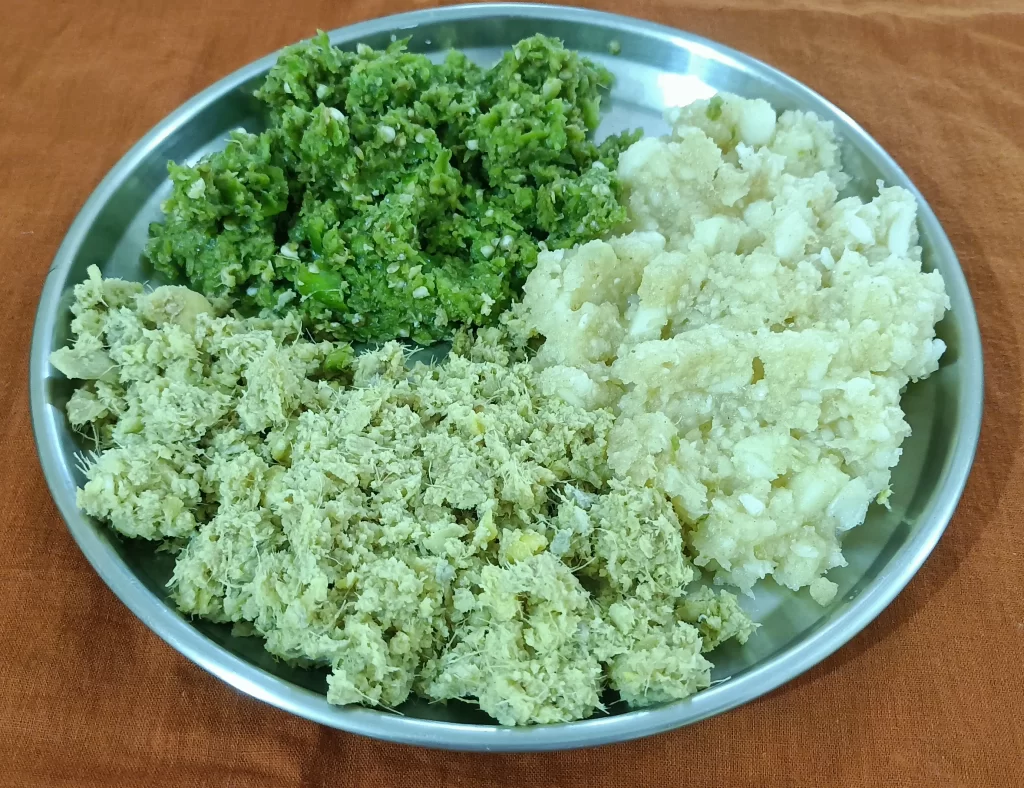
Serve hot with Onion-Cucumber Raita and Ginger-Mint Chammanthi!! Enjoy and savour the flavours!!

Thalassery Chicken Dum Biriyani Recipe
Equipment
- 1 Heavy bottom Pan to cook chicken For preparing the chicken masala base
- 2 Heavy Bottom Vessels 1 for preparing Rice and 1 for layering and for putting dum for biriyani
- 1 Wide wok for frying of Onion
Ingredients
- 1 kg Chicken cleaned, cut as curry pieces or biriyani pieces
- 1 kg Biriyani Rice pricked, washed and drained
- Coriander Leaves chopped
- Mint Leaves leaves only; chopped
- Curry Leaves
- Cashew Nuts split
- Raisins
Preparing Biriyani Masala Powder
- 2 inch Cinnamon broken into pieces
- 8 – 10 Cloves
- 8 – 9 Cardamom
- 1½ tsp Shajeera
- ¾ tsp Cumin Seeds
- ¾ tsp Fennel Seeds
- 1 tbsp Whole White Pepper
- 1½ floret Nutmace
- ⅔ Nutmeg
- 2 floret Star Anise
- a pinch Salt
Frying of Onions – Barista
- 1 cup Oil
- ½ cup Ghee
- 600 g Onion sliced
Preparing Chicken Masala Base
- 2 big Onion thinly sliced
- 120 g Ginger crushed
- 120 g Garlic crushed
- 120 g Green Chilly crushed
- 1 medium Tomato cut into small pieces
- ⅔ cup Curd
- Salt to taste
Cooking the Rice
- Salt to taste
- 1 medium Onion sliced
- 5-6 Star Anise
Instructions
- Heat Wok. Add oil and ghee and fry onion Birista. Remove onto a kitchen tissue to remove excess oil.
- In the same oil, fry cashew and raisins. Remove and keep aside.
- Dry fry the whole spices and grind them to a fine powder.
Chicken Masala Base
- Take 2 tbsp of the fat used to fry the birista. Add the onion slices and fry till translucent.
- Add in the crushed Ginger, Garlic and Green Chilly.
- Once the raw smell vanishes, add in the chicken pieces and sauté.
- Add required salt once the chicken pieces turn whitish. Also, add in ½ tsp of the prepared Biriyani Masala Powder.
- Next, add curd and give a nice mix, along with coriander and mint and curry leaves.
- Add in chopped tomatoes, which is optional. But it enhances the flavours.
- Add in ⅔ part of the birista and mix well and also another ½ tsp of the prepared masala powder.
- Close and cook till about 75% cooked. Dry out the excess water. And reserve for finishing at a later stage.
Preparing Rice
- Measure out the rice using a measuring cup. Prick, clean, wash and drain the rice. Keep aside.
- Measure out water. We need one and a half times the rice quantity in a big pan. And bring to just boil.
- Add in 3/4th of the remaining oil-ghee mixture used to fry Birista. Add the star anise and sauté for a minute till it gives off the aroma. Add the sliced onion and fry till translucent. Now, add in the cleaned rice. Sauté well so that each grain is coated with the fat. Now add salt and give a nice mix.
- Pour in the hot water. Try the taste for salt and add in case it is required. Also, add in a tablespoon each of mint and coriander leaves.
- Let the rice absorb some of the water. Reduce flame and cook covered till almost 80% done. Check in-between so as not to overcook.
Finishing the Chicken Masala Base
- Add in a lavish handful of coriander and mint leaves. Also, add in the juice of one lime.
- Sprinkle a pinch of prepared biriyani masala.
Layering
- Pour a tablespoon of the birista oil and anoint the inside of the vessel.
- Take half of the prepared chicken masala and evenly spread it at the base.Cover up with a layer of one-third rice. Spread evenly.Sprinkle a pinch of the prepared biriyani masala powder. Top it up with some birista, spreading it over the rice. Sprinkle a tablespoon each of chopped coriander and mint leaves.Top it up with a thin layer of rice, just to cover up the fresh flavouring.Repeat the process starting with the remaining chicken, and then the remaining rice. Top it up with another pinch of Biriyani Masala Powder, Birista and the remaining chopped coriander and mint leaves. Spread the fried cashew and raisins.
Sealing the vessel
- One of the most common methods is with a dough made with flour. The dough is elongated and stuck to the rim of the vessel. Press and close the cover of the vessel, sticking it to the dough. This will completely seal the vessel.
Putting on Dum
- We heat the Tawa and then place the vessel with the biriyani.We begin with high heat. This needs to continue for 3-4 minutes. This is to give a boost to the process. After that, we reduce the flame to medium-low and continue till the end.Burn some charcoal. And we place them on the lid of the vessel.Keep on medium-low flame for 10-15 minutes. After that, switch off the gas and let it rest till it is time to serve.
- Serve hot with Onion-Cucumber Raita and Ginger-mint Chammanthi!


Very well explained. This time, i will surely nail my biriyani!